


前言
最近搭建OPCUA的网络,需要搭建OPCUA的服务器和客户端。于是写一下记录。
所使用的系统是Ubuntu 18.04。
正文
1. 前置
1.1 SSH
首先开通SSH服务,用SSH能够更方便服务端和客户端的沟通交流。
sudo apt-get install openssh-server
sudo apt-get install openssh-client
如果SSH连接失败,有这个问题"Host key verification failed"?。那么就去~/.ssh/known_hosts删除相应的keys。去到指定行删除相应的keys。
vim ~/.ssh/known_hosts
1.2 ifconfig
sudo apt install net-tools
然后查询ifconfig,查询内网地址,本文中是10.0.0.26。这样就可以通过ssh查询。(记得VirtualBox里面网卡选择桥接模式,不然虚拟机会不会被放在内网之中)通过ssh seanzou@10.0.0.26,连接虚拟机。
1.3 git
安装Git,以此来下来open62541的github,具体网站点击此处。
sudo apt install git
1.4 Virtual Box
如果要在Virtual Box上面安装Ubuntu的话,尽量上Virtual Box7.0,不然Virtual Box6.0+ 会出现kernal loard error的问题。
1.5 VIM
安装编辑器VIM,这样就可以不用使用记事本了。
sudo apt install vim
2. 建立OPC_UA的libs
2.1 拉取Github仓库
选择1.1 branch,我们这个小白文base在v1.1上面
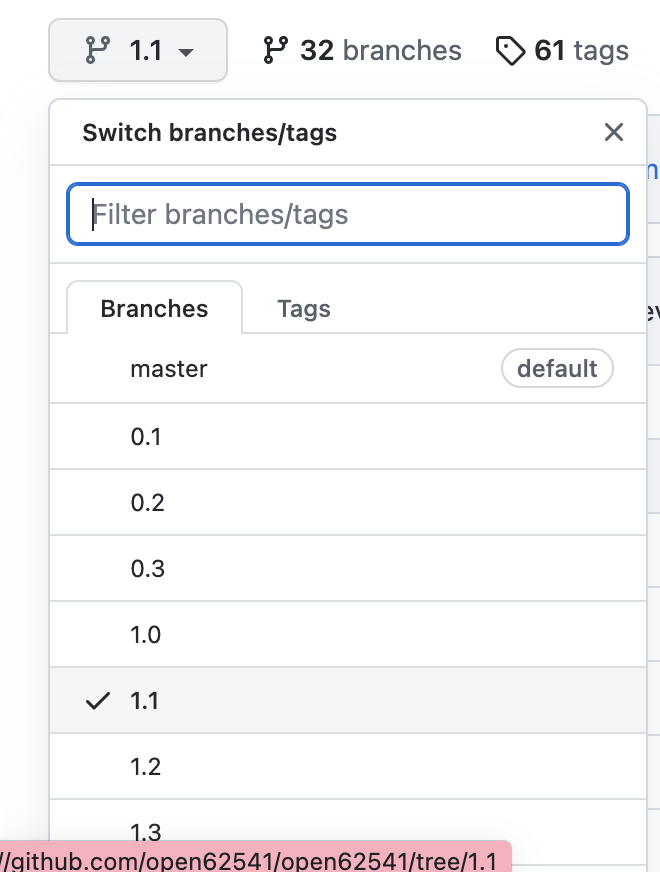
通过命令git clone -b 1.1 https://github.com/open62541/open62541.git
2.2 安装OPC_UA的依赖
sudo apt-get install git build-essential gcc pkg-config cmake python
如果出现Compiling the CXX compiler identification source file "CMakeCXXCompilerId.cpp" failed,那么是依赖的问题,记得安装好OPC_UA的依赖。
2.3 安装OPC_UA libs
git submodule update --init --recursive
mkdir build && cd build
cmake -DBUILD_SHARED_LIBS=ON -DCMAKE_BUILD_TYPE=RelWithDebInfo -DUA_NAMESPACE_ZERO=FULL -DUA_ENABLE_AMALGAMATION=ON ..
make
sudo make install
2.4 创建一个文件夹专门放OPC UA的Client和Server
mkdir ~/C-Projects
mkdir ~/C-Projects/OPC_UA
cp open62541.* ~/C-Projects/OPC_UA
cd ~/C-Projects/OPC_UA
mkdir open62541
mv open62541.* open62541
3. Server
首先,建立一个Server文件夹存放一下文件。
mkdir Server
3.1 Server的问题
尽量在18.04安装Server和Client,不然会有问题。
正如UA_Server_addVariableNode does not work on Ubuntu 20.04 -- BadNodeAttributesInvalid -- Works on Ubuntu 18.04
中所说的:
Unfortunately I didn't get any return on this bug report so far. What I have noticed, playing with the test program I included here-above, is this:
- When compiled under Ubuntu 18.04 with clang-8 / clang-10 / gcc-8, the server program executes correctly on Ubuntu 18.04 and Ubuntu 20.04
- When compiled under Ubuntu 20.04 with clang-8 / clang-10 / gcc-8, the server program fails on Ubuntu 18.04 and Ubuntu 20.04
3.2 创建一个Server文件夹并且编写文件
创建一个Server文件夹
mkdir Server
cd Server
创建一个Server文件夹之后,写一个C语言的makefile
myServer: ../open62541/open62541.o myServer.o
	gcc ../open62541/open62541.o myServer.o -o myServer

../open62541/open62541.o: ../open62541/open62541.c
	gcc -c -std=c99 ../open62541/open62541.c -o ../open62541/open62541.o

myServer.o: myServer.c
	gcc -c myServer.c

clean:
	rm *.o myServer

run:
	./myServer
然后写一个myServer.c的一个文件,参考来自Building a Simple Server。
#include "open62541.h"
#include <signal.h>
#include <stdlib.h>

static volatile UA_Boolean running = true;
static void stopHandler(int sig) {
    UA_LOG_INFO(UA_Log_Stdout, UA_LOGCATEGORY_USERLAND, "received ctrl-c");
    running = false;
}

int main(void) {
    signal(SIGINT, stopHandler);
    signal(SIGTERM, stopHandler);

    UA_Server *server = UA_Server_new();
    UA_ServerConfig_setDefault(UA_Server_getConfig(server));

    UA_StatusCode retval = UA_Server_run(server, &running);

    UA_Server_delete(server);
    return retval == UA_STATUSCODE_GOOD ? EXIT_SUCCESS : EXIT_FAILURE;
}
3.3 编译+运行
然后通过make进行编译,然后make run就能开始运行Server了。
make
make run
3.4 可以用python的客户端对Server进行查询
Johannes4Linux/OPCUA_NodeBrowser
如果是python 2.0 可以使用
python
>>> from node import *
>>> client = Client("opc.tcp://127.0.0.1:4840")
>>> client.connect()
>>> Server_Nodes = ServerNodes(Node(client.get_objects_node(), None))
>>> Server_Nodes.show_hierarchie()
>>> Server_Nodes.node_list[440].get_node_value()
如果是python 3.0 可以使用
python
>>> from node import *
>>> client = Client("opc.tcp://127.0.0.1:4840")
>>> client.connect()
>>> Server_Nodes = ServerNodes()
>>> Server_Nodes.build_list(Node(client.get_objects_node(), None))
>>> Server_Nodes.show_hierarchie()
>>> Server_Nodes.node_list[440].get_node_value()
4. Client
4.1 创建一个Client文件并且编写文件
创建一个Client文件夹
mkdir Client
cd Client
创建一个Client文件夹之后,写一个C语言的makefile文件
myClient: ../open62541/open62541.o myClient.o
	gcc ../open62541/open62541.o myClient.o -o myClient

../open62541/open62541.o: ../open62541/open62541.c
	gcc -c -std=c99 ../open62541/open62541.c -o ../open62541/open62541.o

myClient.o: myClient.c
	gcc -c myClient.c

clean:
	rm *.o myClient

run:
	./myClient
然后写一个myClient.c的一个文件,参考来自Building a Simple Client。
#include "open62541.h"
#include <stdlib.h>

int main(void) {
    UA_Client *client = UA_Client_new();
    UA_ClientConfig_setDefault(UA_Client_getConfig(client));
    UA_StatusCode retval = UA_Client_connect(client, "opc.tcp://localhost:4840");
    if(retval != UA_STATUSCODE_GOOD) {
        UA_Client_delete(client);
        return (int)retval;
    }

    /* Read the value attribute of the node. UA_Client_readValueAttribute is a
     * wrapper for the raw read service available as UA_Client_Service_read. */
    UA_Variant value; /* Variants can hold scalar values and arrays of any type */
    UA_Variant_init(&value);

    /* NodeId of the variable holding the current time */
    const UA_NodeId nodeId = UA_NODEID_NUMERIC(0, UA_NS0ID_SERVER_SERVERSTATUS_CURRENTTIME);
    retval = UA_Client_readValueAttribute(client, nodeId, &value);

    if(retval == UA_STATUSCODE_GOOD &&
       UA_Variant_hasScalarType(&value, &UA_TYPES[UA_TYPES_DATETIME])) {
        UA_DateTime raw_date = *(UA_DateTime *) value.data;
        UA_DateTimeStruct dts = UA_DateTime_toStruct(raw_date);
        UA_LOG_INFO(UA_Log_Stdout, UA_LOGCATEGORY_USERLAND, "date is: %u-%u-%u %u:%u:%u.%03u\n",
                    dts.day, dts.month, dts.year, dts.hour, dts.min, dts.sec, dts.milliSec);
    }

    /* Clean up */
    UA_Variant_clear(&value);
    UA_Client_delete(client); /* Disconnects the client internally */
    return EXIT_SUCCESS;
}
4.2 编译+运行
然后通过make进行编译,然后make run就能开始运行Client,得到来自Server的响应了。
make
make run
总结
呼... 好累写完了0.0
之前是为了之前Ph.D.的考核做的,现在把它完善一下,如果有可能的话把正确地实现了Security Policy的方法一起写一下,整合成新的一篇。
写的有点水水,(\●'\◡'\●),但是应该可以看得懂!
参考
[1] Github open62541 v1.1
[2] open62541 official documentation
[3] Open62541 (OPC UA in C) Tutorial youtube
[4] Virtual Box
[5] Johannes4Linux/OPCUA_NodeBrowser
[6] UA_Server_addVariableNode does not work on Ubuntu 20.04 -- BadNodeAttributesInvalid -- Works on Ubuntu 18.04
[7] Ubuntu 18.04.6 LTS (Bionic Beaver)
[8] VirtualBox安装Ubuntu Linux系统,详细教程(Ubuntu20.04 LTS)
[9] How to Enable SSH Server on Ubuntu 18.04 LTS
[10] Compiling the CXX compiler identification source file "CMakeCXXCompilerId.cpp" failed
[11] Building a Simple Server
[12] Building a Simple Client
Q.E.D.